Installing and Configuring Python Environment
This section describes how to download and configure Python with all the features required to work with the Cimatron API.
Installing Python
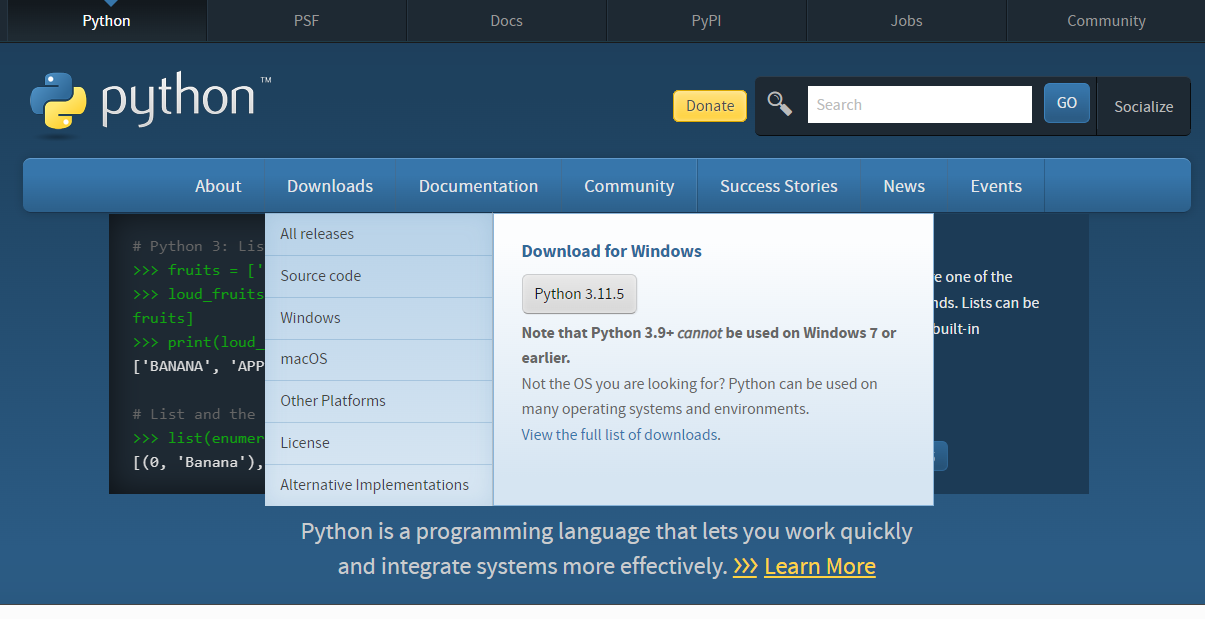
- Go to Python website https://www.python.org/
- Click Downloads > Windows and click on the link to download the setup files for the version of Python you require.
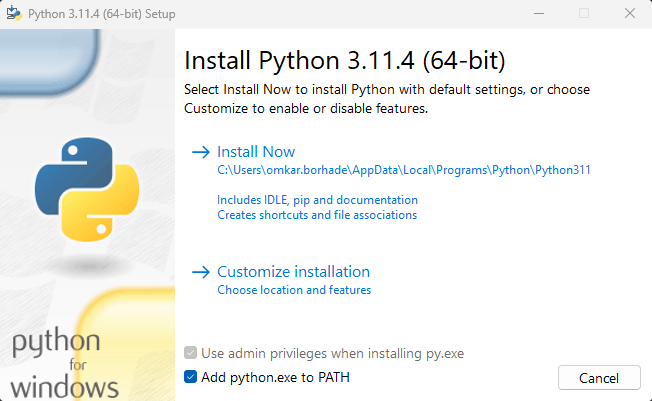
- Run the downloaded setup file.
- In the setup wizard, select the Add python.exe to PATH checkbox.
- Click Customize Installation.
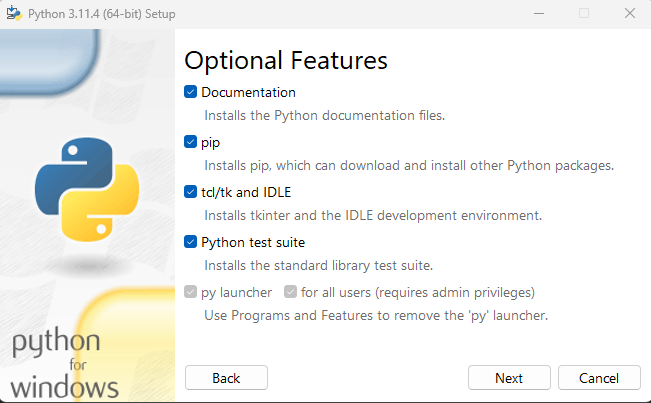
- Select all the Optional Features and click Next.
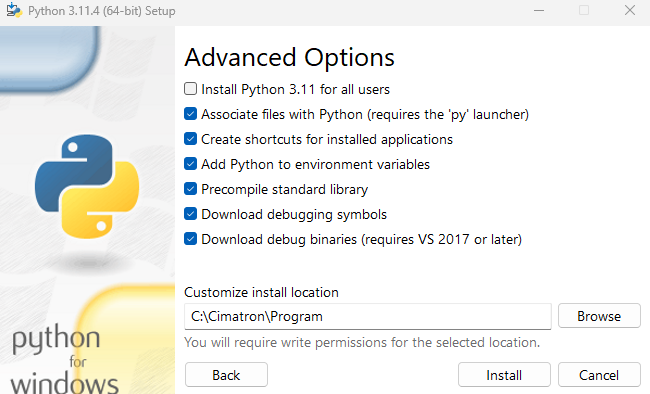
- Select all the necessary Advanced Options and click on the button Next.
- Click Browse next to the Customize install location field and navigate to the folder containing CimatronE.exe, such as C:\Program Files\Cimatron\Cimatron\2024.0\Program.
- Click Install.
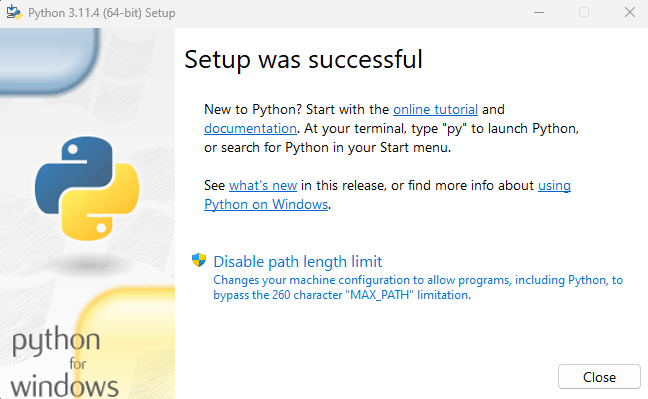
- Click Close when complete.
Configuring Python for Cimatron
This section covers how to create a Application Manifest file and associate it with python.exe that will perform the side-by-side registration required by Cimatron API’s COM pointers.
- Navigate to the folder where CimatronE.exe is located, such as C:\Program Files\Cimatron\Cimatron\2024.0\Program.
- Create a text file named python and change the extension to .manifest.
- Copy the content from the example Python Manifest file to this file.
- Edit the file, replace “Application Name” in the first <assemblyIdentity> tag with “python”.
- Save and close this file.
Associate the Manifest file
This task requires the mt.exe tool, which is a part of Microsoft Windows Software Development Kit (SDK). This tool is found at:
C:\Program Files (x86)\Windows Kits\10\bin\10.0.19041.0\x64\mt.exe
Note: If you do not have this file, you can manually install Windows kits from the following location:
https://developer.microsoft.com/en-us/windows/downloads/windows-sdk/
Select Windows SDK for Desktop C++ x86 Apps.
Be aware that this process may install mt.exe in a different location to that stated in these instructions.
- Add path of mt.exe to the windows paths in environment variables of windows
- From the Windows task bar, search for Edit system environment variables and open the control panel.
- Click Environment Variables.
- In User Variables for <username>, click New.
- In the new User Variable window:
- enter a Variable name
- click in the Variable value field and the click Browse File... . Add the path to where mt.exe is stored, such as C:\Program Files (x86)\Windows Kits\10\bin\10.0.19041.0\x64\.
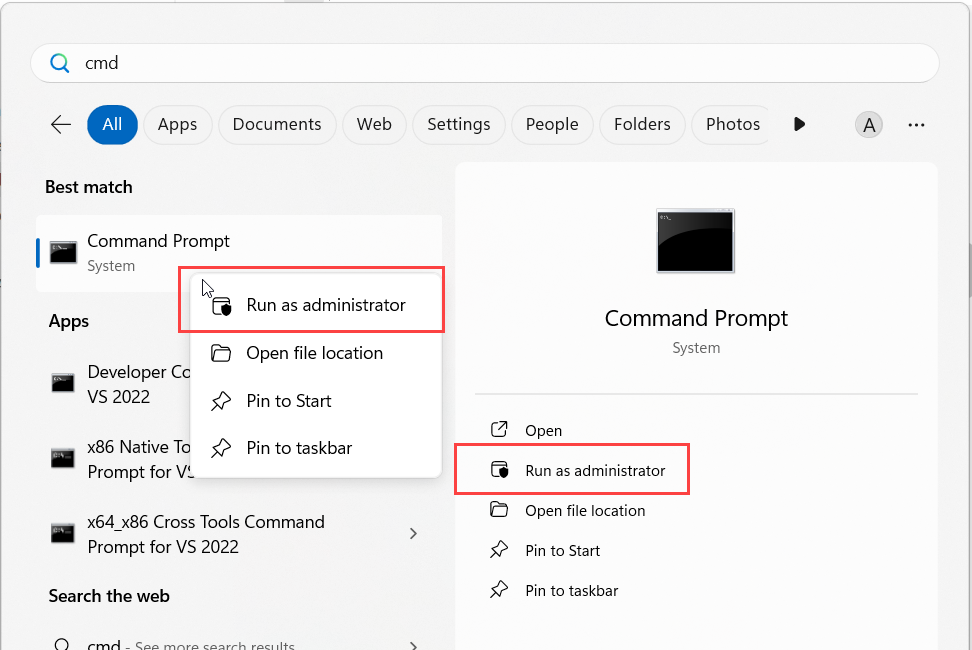
- Open a Command Prompt window with Administrator privileges.
From the Windows task bar, enter cmd and either right click on the result to display the pop up menu or select the option in the adjacent submenu. Select 'Run as Administrator' and open the application.
- Verify mt.exe is added to the path.
mt.exe
You will see an error message if the path variable is not successfully set. - In the Command Prompt window, enter
cd <Cimatron Installation Directory>\Cimatron\Program (replace <Cimatron Installation Directory> with path of Cimatron installation path) - Run following command:
mt.exe -manifest "python.manifest" -updateresource:"python.exe;#1"
- If command executes successfully, your Python environment is correctly configured to use Cimatron APIs.
Creating a Python Visual Studio Project
This section describes how to create a Cimatron API Application using Python. The following steps and snapshots are based on Visual Studio 2019. You can install Python development component for Visual Studio from Visual Studio Installer > Modify > Python Development.
Start a New Project
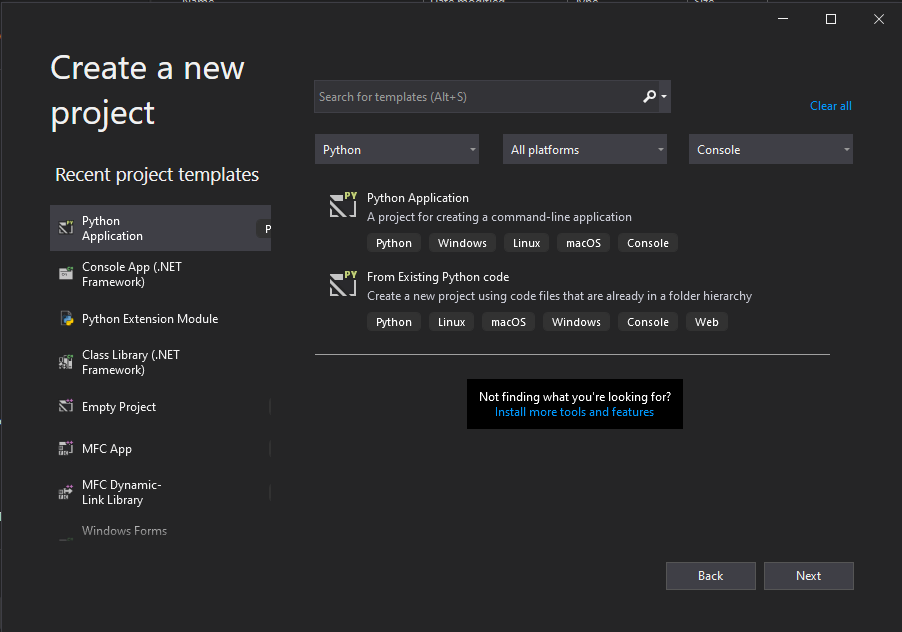
- Create a new Python Application project. Select Python Application and click Next.
-
In the subsequent screen, provide a Project name and click Create.
- Change Python Environment—Select the Python Environment from the Cimatron Installation Directory (If the Python Environment window is not shown in the right most menu, click Tools > Python > Python Environments or View > Other Windows > Python Environments, or use the keyboard shortcut Ctrl-K).
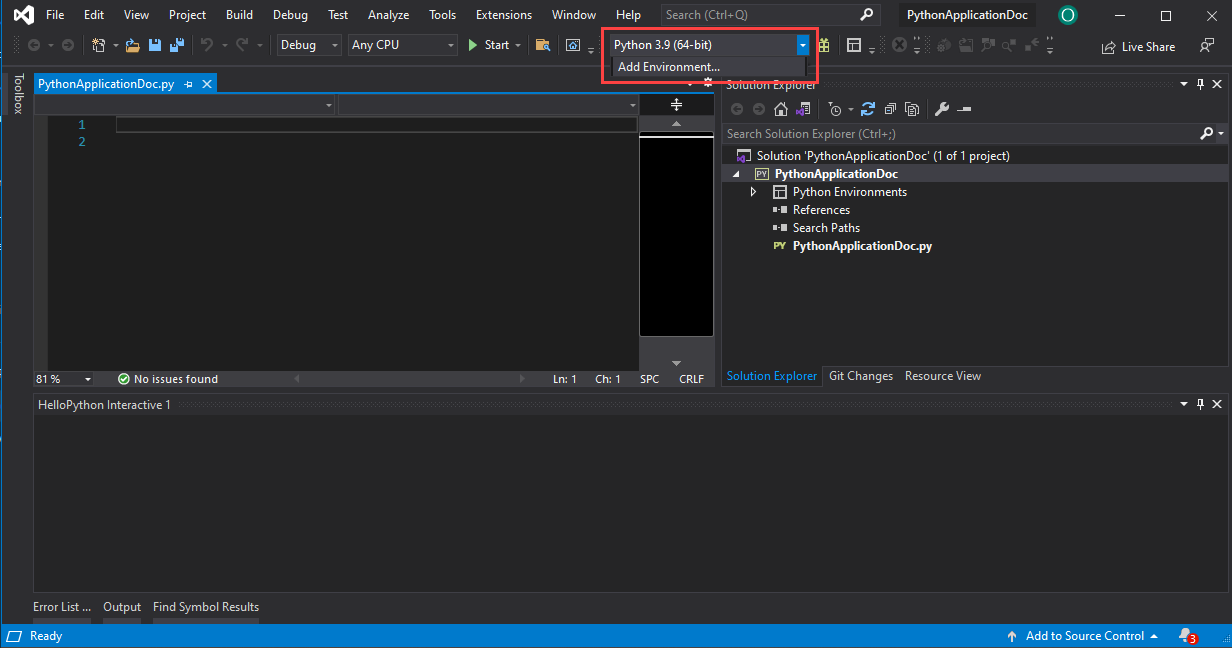
Note: If the option is not present, select Add Environment as shown below.
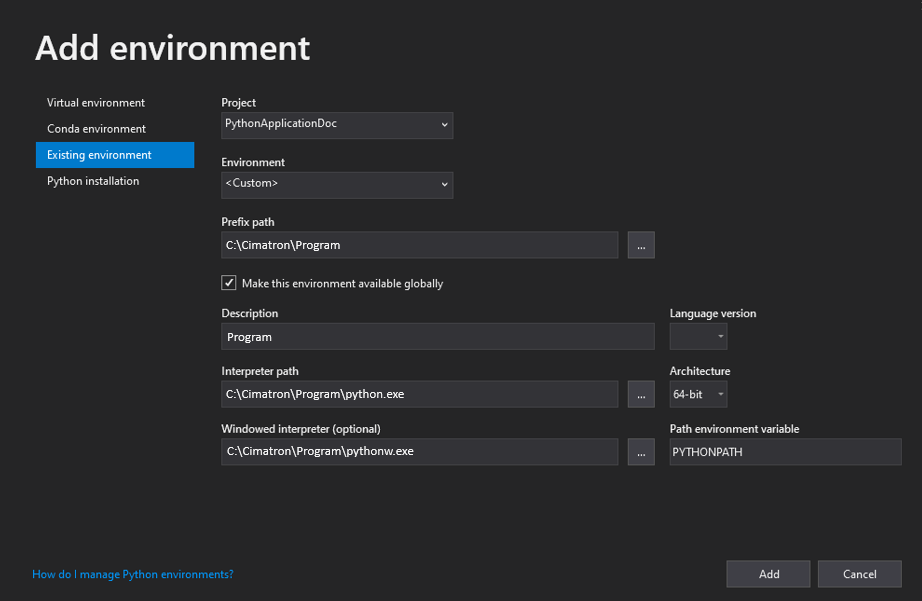
- Click Existing Environment in the left column.
- In Environment option, select environment from <Cimatron Installation Directory>\Cimatron\Program
- If this option is not present, select Custom in environment and add the above environment in Prefix Path.
- Click Add.
Add Interop References
Interop dlls are imported in python script using clr module. This module can be imported from pythonnet package.
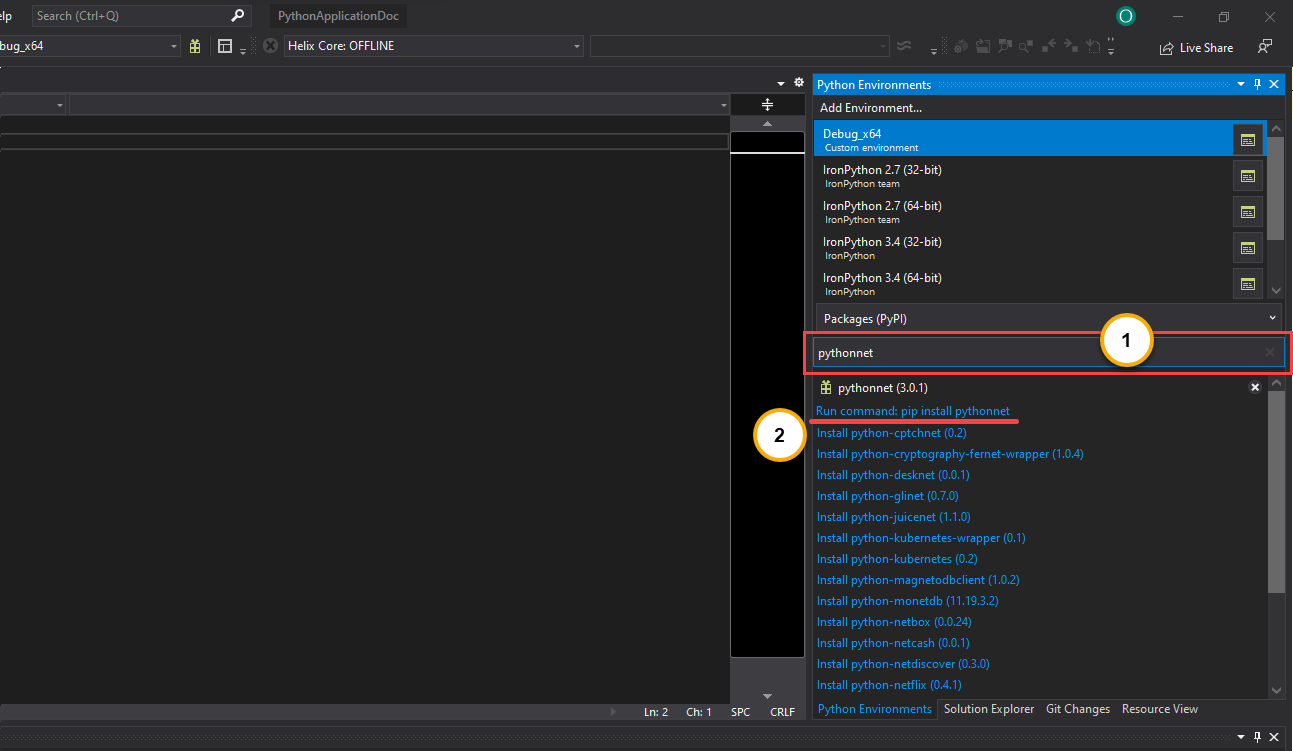
Note: If pythonnet is not available, perform the following steps to install it:
-
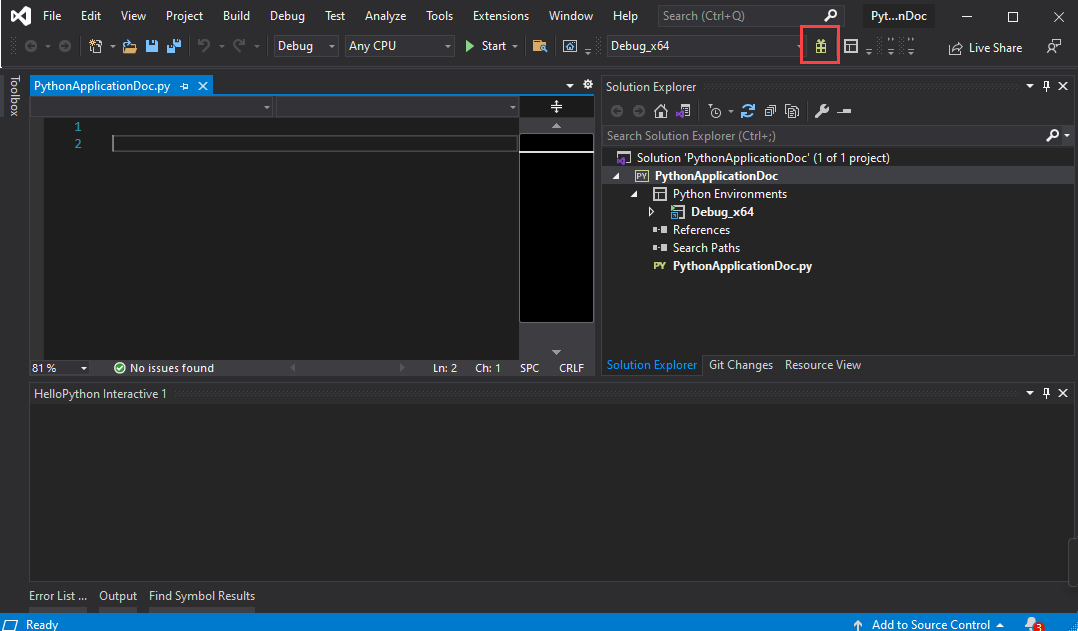
Click the Package Manger icon next to the python environment.
-
Search pythonnet in packages and select “Run command: pip install pythonnet” (as shown in image below)
-
Search pythonnet here
-
Select “Run command: pip install pythonnet”
-
- Use AddReference function from clr module to add necessary interop dlls in .py file.
- Attach all Cimatron API Interop Files
- interop.CimAppAccess.dll
- interop.CimatronE.dll
- interop.CimBaseAPI.dll
- interop.CimMdlrAPI.dll
- interop.CIMMiscAPI.dll
- interop.CimNcAPI.dll
- interop.CimServicesAPI.dll
- interop.CimElectrodeAPI.dll
Example
#import clr module
import clr
#add reference to required interop dll
clr.AddReference("interop.CimAppAccess")
clr.AddReference("interop.CimatronE")
clr.AddReference("interop.CimServicesAPI")
clr.AddReference("interop.CimBaseAPI")
clr.AddReference("interop.CimMdlrAPI")
#import added references
import interop.CimAppAccess as CimAppAccess
import interop.CimatronE as CimatronE
import interop.CimServicesAPI as CimServicesAPI
import interop.CimBaseAPI as CimBaseAPI
import interop.CimMdlrAPI as CimMdlrAPI
Get Access to IApplication interface
Start your application using the code in one of the following options.
- Option 1: If Cimatron is not running, then create a launch Cimatron and get application object.
#AppAccess Object
aCimAppAccess = CimAppAccess.AppAccess()
#Cimatron Application Object
aCimApp = None
#Get Running instance of cimatron application
#If not running, launch cimatron and get its instance
while(aCimApp == None):
aCimApp = (CimatronE.IApplication)(aCimAppAccess.GetApplication())
- Option 2: If Cimatron is not running, then create a launch Cimatron and get application object.
#Create Main Cimatron Application object
CimUtilityApp = CimAppAccess.CimUtilityApp();
#Force start Cimatron Application
CimApp = None
while(CimApp == None):
cimAppp = (CimatronE.IApplication)(CimUtilityApp.GetIApplication())
Write your code
If you have successfully compled all these steps, you are ready to use Cimatron API’s. Refer to the example in Example for a Code Example.
You can directly run this script from Visual Studio as long as it is being run using the python environment provided with Cimatron is being used
(Optional) Bundling into a single .exe
This is an optional step to bundle your .py file into an executable .exe file.
- Ensure that path to python.exe is added in Environment Variables.
- Create an app.manifest file in the same directory where .py file is present
- Install pyinstaller if its not already installed
- You can check if pyinstaller is installed in your device by running command pyinstaller --version in Windows Terminal or Command Prompt.
- If it is not installed, you can install it using the following command
pip install pyinstaller in Windows Terminal or Command Prompt
- Open windows terminal.
- Change directory to folder where .py file is present using cd <dir-path>. Replace dir-path with path to .py file
- Run following command to bundle it into an executable and place it into Cimatron Application directory:
pyinstaller pythonextrudeapplication.py -F -m app.manifest --distpath <Cimatron Installation Directory>\Cimatron\Program
Replace <Cimatron Installation Directory> with path to your Cimatron installation directory.
- Executable will be generated in <Cimatron Installation Directory>\Cimatron\Program directory.
Example
Here’s an example to create a box using Cimatron API in python.
import clr
#Adding references of required interop dlls
clr.AddReference("interop.CimAppAccess")
clr.AddReference("interop.CimatronE")
clr.AddReference("interop.CimServicesAPI")
clr.AddReference("interop.CimBaseAPI")
clr.AddReference("interop.CimMdlrAPI")
#importing modules from interop dlls
import interop.CimAppAccess as CimAppAccess
import interop.CimatronE as CimatronE
import interop.CimServicesAPI as CimServicesAPI
import interop.CimBaseAPI as CimBaseAPI
import interop.CimMdlrAPI as CimMdlrAPI
#Getting AppAccess Object
aCimAppAccess = CimAppAccess.AppAccess()
#Getting instance of CimatronE Application
aCimApp = None
while(aCimApp == None):
aCimApp = (CimatronE.IApplication)(aCimAppAccess.GetApplication())
aPdm = aCimApp.GetPdm()
aDoc = (CimBaseAPI.ICimDocument)(aCimApp.GetActiveDoc())
aModelCont = (CimMdlrAPI.IModelContainer)(aDoc)
aMdlrModel = (CimMdlrAPI.MdlrModel)(aModelCont.Model)
#Creating Sketcher Procedure
aSketchProc = (CimMdlrAPI.MdSketcher)(aMdlrModel.CreateProcedure(CimMdlrAPI.MdProcedureType.cmSketcherProcedure))
aMdSketcher = (CimMdlrAPI.IMdSketcher)(aSketchProc)
aISketcher = (CimServicesAPI.ISketcher)(aMdSketcher.Sketcher)
#Setting rectangle co-ordinates
from System import Array, Double
myarray = Array[Double](4)
myarray[0] = -50
myarray[1] = -50
myarray[2] = 50
myarray[3] = 50
aISketcher.AddBox(myarray)
# Evaluate function to create the opened sketcher
aISketcher.Evaluate()
# Execute the Creation
aSketchProc.Execute()
#Getting sketcher body as entity using query and filter
aSqrSketch = None
aQuery = (CimMdlrAPI.IEntityQuery)(aSketchProc)
aFilter = (CimBaseAPI.FilterType)(aQuery.CreateFilter(CimMdlrAPI.EFilterEnumType.cmFilterEntityType))
aFilter.Add(CimBaseAPI.EntityEnumType.cmBody) # search for the single BODY created in the sketcher
aQuery.SetFilter((CimMdlrAPI.IEntityFilter)(aFilter))
aTmpEntList = aQuery.Select()
aSqrSketch=(CimMdlrAPI.ICimEntity)(aTmpEntList[1])
aProcExt = (CimMdlrAPI.MdSketcher)(aMdlrModel.CreateProcedure(CimMdlrAPI.MdProcedureType.cmExtrudeProcedure))
#Creating Extrude Procedure
IMdExtrude = (CimMdlrAPI.IMdExtrude)(aProcExt);
#setting necessary parameters
IMdExtrude.Contour = aSqrSketch
IMdExtrude.Delta = 50
IMdExtrude.Mode = CimMdlrAPI.ExtrudeSweepMode.cmExtrudeSweepModeNew
IMdExtrude.SideOption = CimMdlrAPI.ExtrudeSideOption.cmExtrudeBothSide
IMdExtrude.DraftAngle = 0
IMdExtrude.DraftSideOption = CimMdlrAPI.ExtrudeDraftSideOption.cmExtrudeDraftOutside
IMdExtrude.InvertOption = CimMdlrAPI.ExtrudeInvertOption.cmExtrudeForward
IMdExtrude.OpositDelta = 50
#Executing Extrude
aProcExt.Execute()