API Application (C#) Project
The steps required to create an API application are shown here. This example was created using Visual Studio 2022.
There are 5 steps;
- Create a new Solution
- Configure the Project
- Add Interop References
- Add the Manifest file
- Access the iApplication interface
Create a new Solution
The Solution acts as the container for all the work you will do.
- Start a New Project. Open Visual Studio and click File > New > Project (or use the keyboard shortcut Ctrl-Shift-N) to start the new project wizard.
- Filter the list of templates using the selectors at the top of the right hand pane. Use the filter settings C#, Windows, and Console.
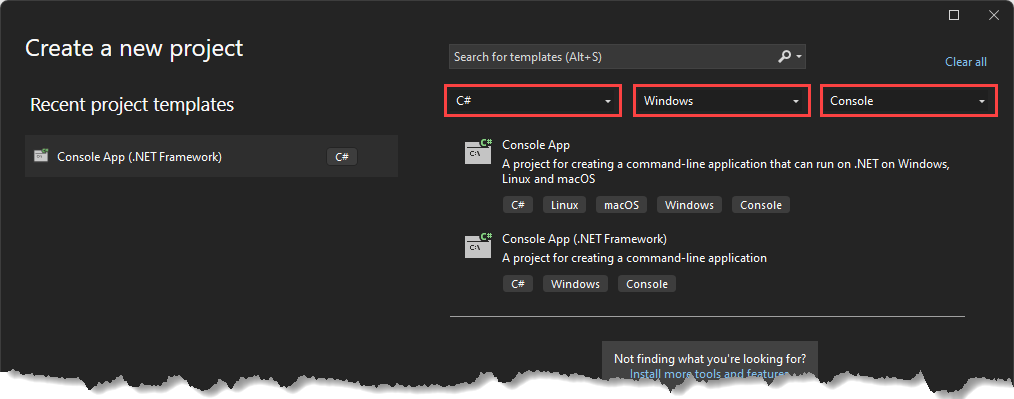
- In the list of results, select Console App (.NET Framework).
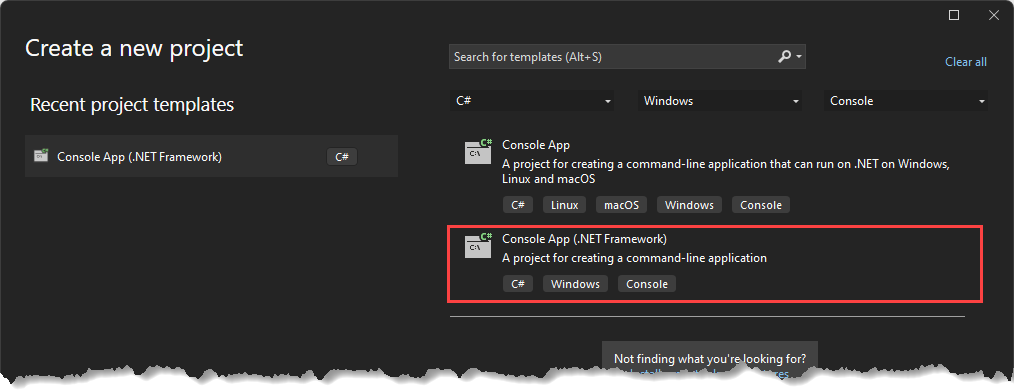
- Click Next.
- In the next wizard screen, provide a Project name, select a storage Location and select .NET Framework 4.8 in the Framework dropdown. The Solution name is derived from the Project Name.
Note If .NET Framework 4.8 is not displayed, select any other framework in the dropdown, then follow the optional steps in Configure the Project.
- Click Create.
Configure the Project
The project requires additional configuration to ensure it is compatible.
- Go to Project > <Project Name> Properties. The Project Properties tab has a list of options on the leftmost side, the Application tab is open by default.
- OPTIONAL - If .NET Framework 4.8 was not available when the project was created;
- Click Target Framework: > Install other Frameworks... to open the Download .NET SDKs for Visual Studio in your default browser.
- From .NET Framework section, click the Developer Pack link for .NET Framework 4.8.
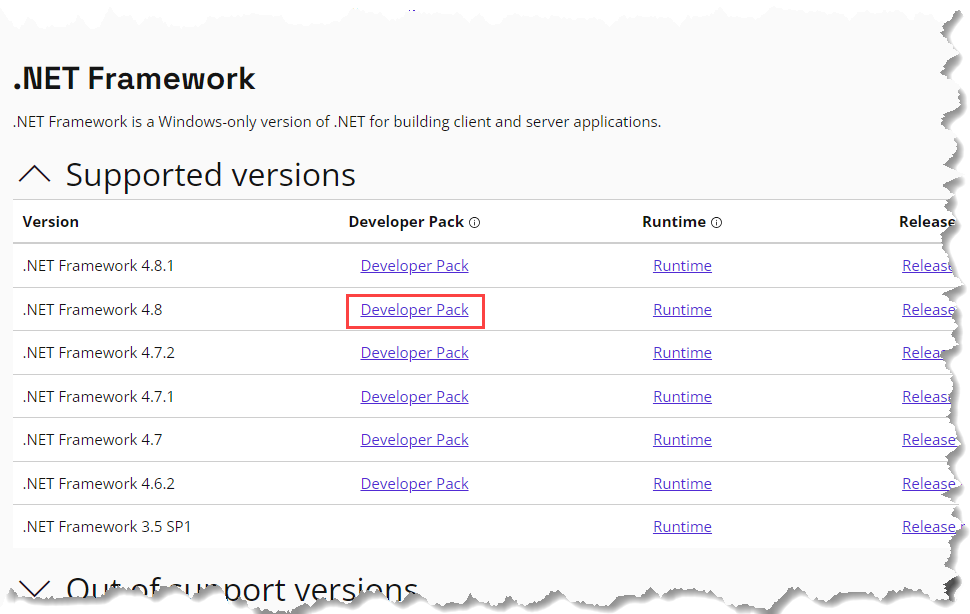
If the download doesn't start automatically, click on the link to download it manually. - When download is complete, install the package.
- Close and Reopen the software. Visual Studio's .NET Framework 4.8 will be visible in the Target Framework: dropdown.
- Open Project > <Project Name> Properties > Build.
- In the Platform dropdown, select Active(x64).
- In the Output panel, browse to set the Output Path to your Cimatron installation Program folder (typically ..\Program Files\Cimatron\Cimatron\<version>\Program\).
- Save and Close the Properties tab.
Add Interop References
Interop references provide specific functionality to the application, such as access to the commands and functions in Cimatron.
-
If the Solution Explorer is not displayed, click View>Solution Explorer, or use the keyboard shortcut Ctrl+Alt+L.
-
Right-click on References in Solution Explorer and select the Add Reference option.
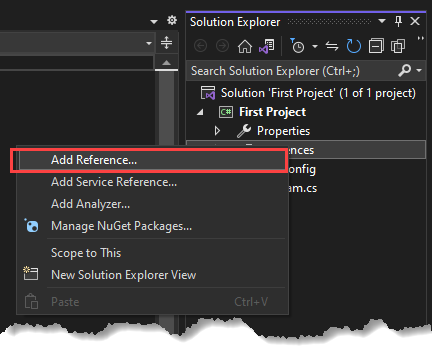
- Browse to ..\Cimatron\Program and add all Cimatron API Interop Files by selecting the checkboxes.
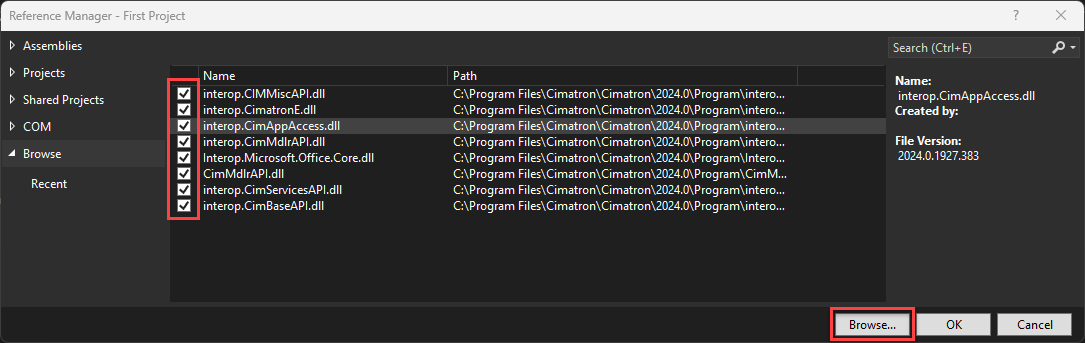
Select the following files;- interop.CimAppAccess.dll
- interop.CimatronE.dll
- interop.CimBaseAPI.dll
- interop.CimMdlrAPI.dll
- interop.CIMMiscAPI.dll
- interop.CimNcAPI.dll
- interop.CimServicesAPI.dll
- interop.CimElectrodeAPI.dll
Add Manifest File
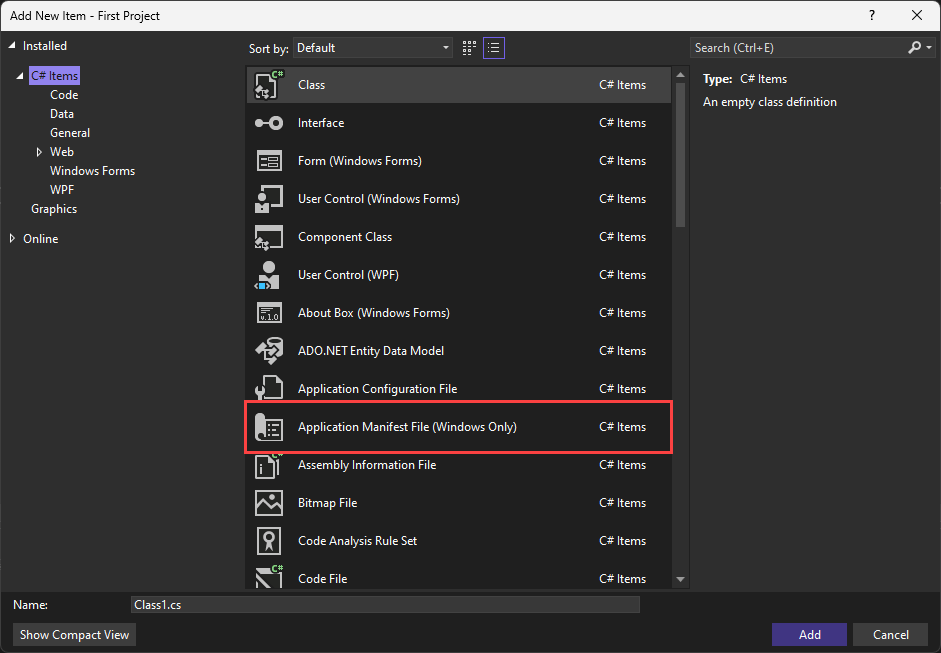
- In Solution Explorer, right-click on the project name, then select Add > New Item....
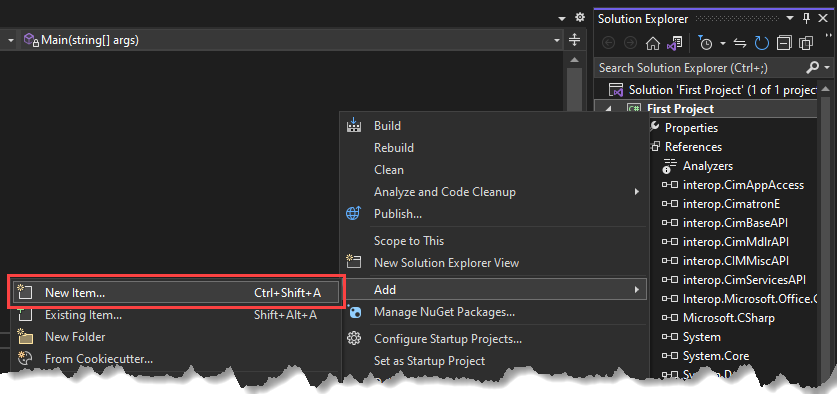
- Select the Application Manifest File option (the default file name is app.manifest).
- Update the Manifest file.
- Replace all the manifest file content with content from the example C# Manifest File.
- Replace Application Name in the first ‹assemblyIdentity› tag with name of your project.
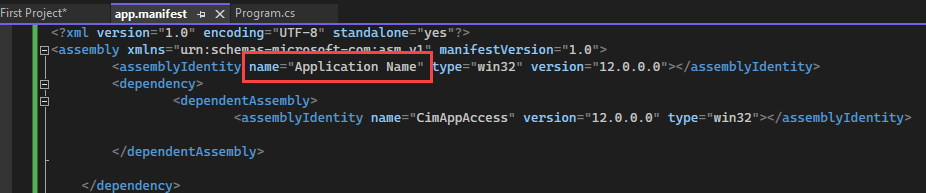
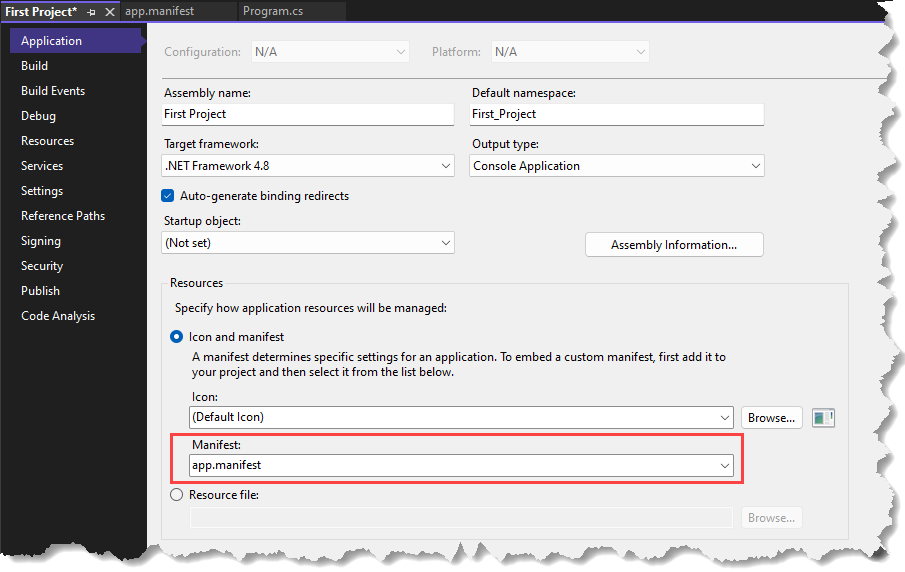
- Check in the Project Properties > Application tab > Resources pane that the Manifest field includes the name of the manifest file.
Access the iApplication interface
There are two ways to access the interface, the one you use depends on whether your application will be used with a running instance of Cimatron, or if it will create a new Cimatron instance.
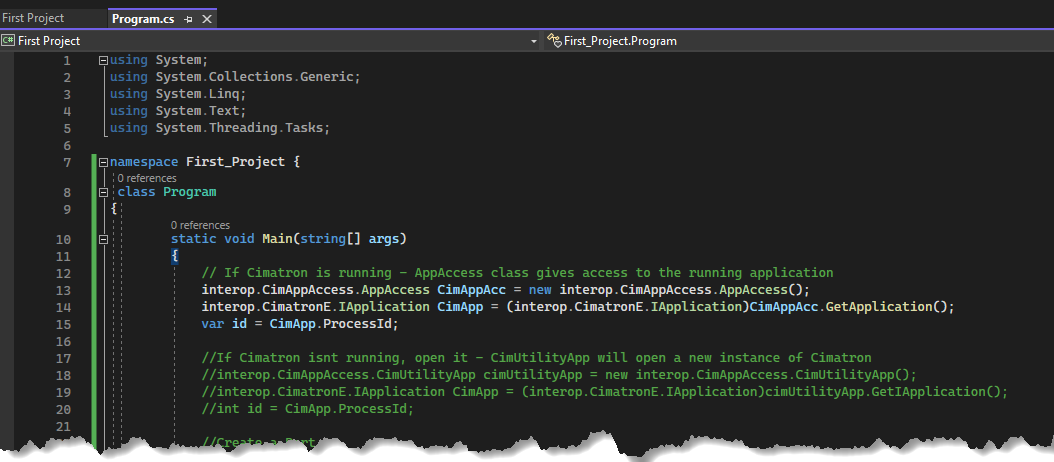
- Open Solution Explorer > Project Name > Program.cs and add the appropriate code in the static void Main(string[] args) section.
-
If Cimatron is running, the AppAccess class gives access to the running application.
interop.CimAppAccess.AppAccess CimAppAcc = new interop.CimAppAccess.AppAccess();
interop.CimatronE.IApplication CimApp = (interop.CimatronE.IApplication)CimAppAcc.GetApplication();
var id = CimApp.ProcessId; -
If Cimatron isnt running, open it - CimUtilityApp will open a new instance of Cimatron.
interop.CimAppAccess.CimUtilityApp cimUtilityApp = new interop.CimAppAccess.CimUtilityApp();
interop.CimatronE.IApplication CimApp = (interop.CimatronE.IApplication)cimUtilityApp.GetIApplication();
int id = CimApp.ProcessId;
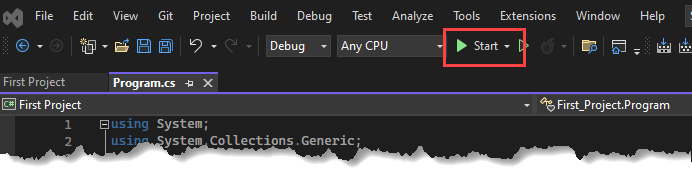
The image here shows the first option;
-
-
Click Start to test the configuration.